



A good marine air conditioner can only perform as well as its installation allows.
We occasionally see systems blamed for poor cooling when the real problem is much simpler: the machine cannot get enough return air, the supply duct is restricted, the electrical connection is undersized, or one system has been asked to condition multiple enclosed spaces.
SeaAir systems are designed to be compact and straightforward to install, but there are a few things worth getting right the first time. Proper placement, airflow, water flow, and electrical connections are all essential to performance, safety, and equipment life.
Return Air Matters More Than You Might Think
An air conditioner doesn't just blow cold air into a cabin. It has to continuously pull cabin air back through the evaporator, condition it, and return it to the space.
That makes the return-air path every bit as important as the supply vent.
SeaAir recommends installing the return grille directly in front of the unit, with approximately 12 × 12 inches, or 144 square inches, of return-air area. The return should generally be positioned low, while the conditioned supply air is delivered higher in the cabin.
Don't bury the machine inside a nearly sealed cabinet and expect it to breathe through a few small openings.
Restricted return air means restricted airflow through the entire system.
Return-air placement also matters because the SeaAir temperature and humidity sensor is installed in the air filter and measures the incoming return air. That information is what the system uses to determine how hard it needs to work and when the cabin has reached the desired conditions.
Give the machine a clear path to the cabin air it is actually trying to condition.
Supply Air Needs a Clear Path Too
What happens after the air leaves the evaporator is equally important.
SeaAir uses 4-inch supply ducting, and that duct should remain as straight and unrestricted as practical. Kinked, crushed, or sharply bent duct creates back pressure on the blower, reducing airflow and potentially reducing cooling performance.
We recommend using insulated ducting. Insulation helps maintain the temperature of the conditioned air as it travels through hot cabinets and other spaces, while also helping prevent condensation from forming on the outside of cold ductwork. The manual also recommends keeping runs relatively straight with minimal turns.
Supply grilles with adjustable louvers are useful because they allow you to direct the conditioned air into the cabin rather than simply blowing it toward the nearest surface.
A simple rule for ducting is:
Short. Smooth. Insulated. Unrestricted.
Don't Split One System Between Separate Cabins
It can be tempting to put a Y-fitting on the supply duct and send one branch into one cabin and another branch into another.
We generally do not recommend splitting a SeaAir system between separate enclosed spaces.
The system is designed around a supply-air path, a return-air path, and a temperature and humidity measurement from the space being conditioned.
Once you start dividing the supply between separate cabins, that relationship becomes much harder to control.
One branch may flow better than the other. One cabin may have a much greater heat load. A closed door can isolate supply air from the system's return. Meanwhile, the temperature sensor may be measuring one space while a substantial portion of the machine's output is being sent somewhere else.
The result can be uneven temperatures, poor cycling, longer run times, and disappointing performance.
For separate enclosed cabins, appropriately sized independent systems are generally the better approach.
One system. One climate zone. One proper return-air path.
Electrical Connections Are Not the Place to Improvise
These are high-current DC systems, so electrical installation matters.
The SeaAir manual calls for appropriately sized marine-grade wire based on both current draw and total wire length. For most 12v installations, 4/2 AWG duplex cable is recommended, but the correct size must still be verified for the actual run length and load. The system should also be installed on a dedicated circuit rather than sharing power with another appliance. 24, 48, and 120v installation wire sizes vary.
Undersized wiring creates resistance. Resistance creates voltage drop and heat.
At best, excessive voltage drop can keep the air conditioner from operating the way it was designed to. At worst, undersized wiring can overheat and create a serious fire hazard. The manual specifically warns that improperly sized power cables can result in excessive resistance, overheating, equipment damage, and fire.
Polarity matters as well. The SeaAir wiring guide calls for verifying positive and negative connections before energizing the system. Keep the breaker disengaged while making connections and only energize the system after the wiring has been completed and checked.
Your Battery Bank Is Part of the Installation
A DC air conditioner is only as good as the electrical source supplying it.
SeaAir's 12V system can draw substantial current at higher output levels. The manual lists estimated cooling consumption of approximately 30 amps at 5,000 BTU, 45 amps at 9,000 BTU, and 65 amps at 12,000 BTU, with operating demand varying with conditions.
That means the battery bank needs to be capable of supplying the required current without excessive voltage drop.
A battery bank may show an acceptable voltage while sitting idle and then sag significantly once a large load is applied. The condition of the batteries, state of charge, terminal connections, cable size, cable length, switches, breakers, and other connections between the battery and air conditioner can all affect the voltage that actually reaches the machine.
This is particularly important on 12V systems because high current makes voltage drop more significant.
Don't just measure voltage at the battery. If you're troubleshooting a voltage problem, measure what the air conditioner is actually receiving while it is operating under load.
SeaAir systems can report a low-voltage condition when the electrical supply falls too far, so a system shutting down for low voltage doesn't necessarily mean the battery is empty—it may indicate a weak battery bank, excessive voltage sag, undersized wiring, a poor connection, or resistance somewhere in the circuit.
Good battery capacity is important, but so is the battery bank's ability to deliver that energy at the required current.
Connections Need to Be Clean and Tight
Cable size is only part of the equation.
A properly sized cable with a poor terminal connection can still create resistance and voltage drop.
Battery terminals, bus bars, breakers, switches, and terminal blocks should all have clean, properly crimped and secure connections. Connections should also be protected from moisture, and wire should be routed away from sharp edges and high-temperature areas.
With high-current DC equipment, seemingly small amounts of resistance can become significant.
If a connection is getting hot, something is wrong.
Installation Safety Matters
Marine installations introduce hazards that don't exist in a house.
The SeaAir system is not ignition protected and should not be installed where gasoline vapors, LPG/CNG, fuel-system components, or other flammable fumes could accumulate.
Electrical components should also never be positioned underneath water pumps, hoses, or tanks where a leak could expose them to water.
If you're not comfortable working with high-current electrical equipment, seawater plumbing, or marine HVAC systems, use a qualified installer.
Practical SeaAir Installation Checklist
Before calling the installation complete, take a few minutes and work through the entire system.
Airflow
- Return grille is directly in front of or very close to the air conditioner
- Approximately 12 × 12 inches of unrestricted return-air area is available
- Return air comes from the same space being conditioned
- Temperature/humidity sensor is properly positioned in the return-air filter
- Supply grille is positioned above the return when practical
- 4-inch supply duct is insulated
- Ducting is not crushed, kinked, or sharply bent
- Duct run is reasonably short with minimal unnecessary turns
- Supply air has a clear path into the cabin
- One unit is not being divided between separate enclosed cabins
Electrical
- Battery bank is appropriate for the expected load
- Correct system voltage has been verified
- Marine-grade cable is properly sized for the current and total wire length
- System is supplied by a dedicated circuit
- Correct breaker and overcurrent protection are installed
- Positive and negative polarity have been verified
- Battery, breaker, bus-bar, and terminal connections are clean and tight
- Proper crimped terminals are used
- Wiring is protected from moisture
- Wiring is supported and kept away from sharp edges and excessive heat
- Breaker remains off while electrical work is being performed
Voltage
- Battery voltage is checked at rest
- Voltage is also checked at the SeaAir unit while operating under load
- No excessive voltage drop is present between the battery bank and the system
- Battery terminals and connections do not become abnormally warm
- Any low-voltage alarms are investigated rather than simply reset
Water & Drainage
- Seawater pump is mounted below the waterline
- Sea strainer is installed before the pump
- Pump is flooded and properly primed
- Strong, continuous water flow is visible at the overboard discharge
- All seawater hose connections are tight
- Two stainless-steel clamps are used where appropriate
- Condensate pan drains freely
- Condensate hose continuously runs downhill without low spots that can trap water
Safety & Final Check
- Air conditioner and electrical components are mounted securely
- Electrical equipment is not located beneath hoses, pumps, or tanks
- Unit is not installed where gasoline, LPG/CNG, fuel vapors, or other flammable fumes may accumulate
- Air filter is installed and accessible for cleaning
- All fittings and hose clamps have been inspected
- Cooling operation and fan performance have been tested
- Seawater discharge has been confirmed while the system is running
- Electrical connections are checked for abnormal heat after the system has operated under load
A few extra minutes spent on these checks can prevent hours of troubleshooting later.
Good Installation Makes an Efficient System Better
Modern variable-speed air conditioning can do a lot with relatively little energy—but the installation has to let it.
Give the unit plenty of return air.
Give the supply air a short, insulated, unrestricted path back into the cabin.
Keep the system focused on a single climate zone rather than trying to divide one machine between multiple enclosed rooms.
Make sure the battery bank can comfortably supply the load.
Use properly sized marine-grade wiring, minimize voltage drop, and make every electrical connection clean and secure.
And above all, install the equipment somewhere safe and appropriate for high-current marine electronics.
These aren't complicated details.
But getting them right is often the difference between a system that simply runs and one that performs the way it was designed to.
Keep reading
More answers from the same conversations
Your Generator Should Be the Backup — Not the Plan
Marine generators are useful. There are times when having one aboard is extremely valuable.
READ THE ARTICLE →
How Much Battery Do You Need to Run 12V Air Conditioning Overnight?
Running air conditioning overnight without a generator used to sound unrealistic on most boats. With modern lithium battery banks and efficient var...
READ THE ARTICLE →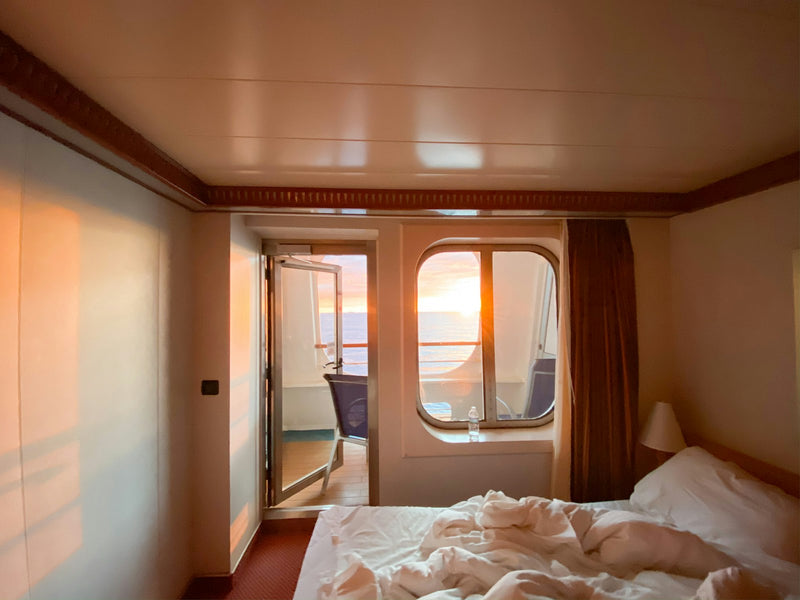
Why Every Cabin Should Have Its Own Air Conditioner
Marine air-conditioning systems are often sized to handle several cabins or a large portion of the vessel at once. But overnight, you may only need...
READ THE ARTICLE →